Monday, November 19, 2012

How to set default App on Android?


Alright, so now we have installed multiple Internet browsers of our choice. How will we set the preference of which browser to launch to open links from, let’s say your mail box?


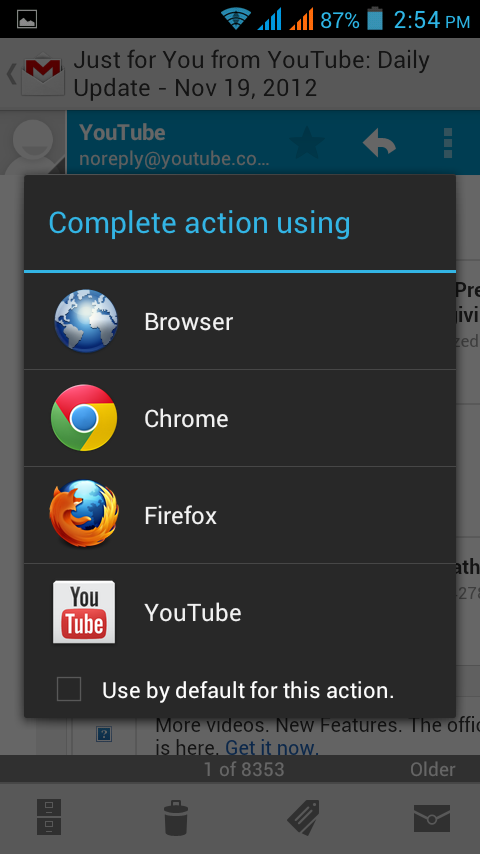
The answer is by setting a default application. Default apps settings in Android happen by default! Meaning, in case of web browsers, when you try to open a link from some application and if you have multiple browsers installed and if the default is not already set, you will be presented with the options screen as shown.

Observe the Use by default for this action checkbox. If you check this checkbox and then make a selection then that app will be set as default app for your current action! Isn’t that neat?

Alright, now that we have set the default app, how can we clear it so as we can set a new default by above way?

Okay so here we have a direct Option. Do this.
  1. Goto Manage apps screen
    • ICS - You can go directly from home page or from System settings
    • Gingerbread – Goto System settings->Applications->Mange applications.
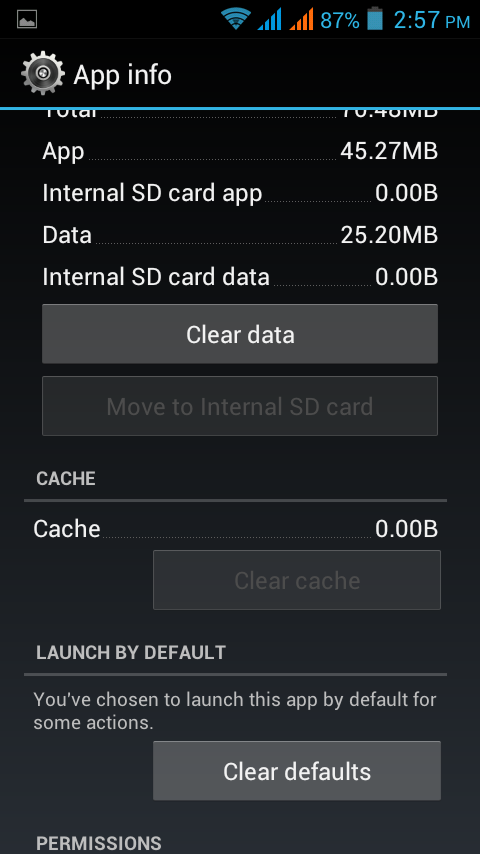
  2. Select the app that was set as default and you will be presented with App Info screen.
  3. Scroll down and go to the Launch By Default section to see a button called as Clear defaults. Just hit that and you are done!


How to install Apps on Andoid?


The essence of an Android phone apart from others is its ability to let us install apps from nearly half million (4 lakh+) applications.

So how do we go about installing apps?


Well there are multiple ways. If your devices come preloaded with Google Play then see instructions below. If they come with manufacturer specific app store then most likely it will function similar to Google Play and below instructions may still help.


Note: Using Google Play Store will require the Google account to set-up. Please see this article to assist you with it.
  1. Launch Google Play Store (most likely it is located in the apps menu)
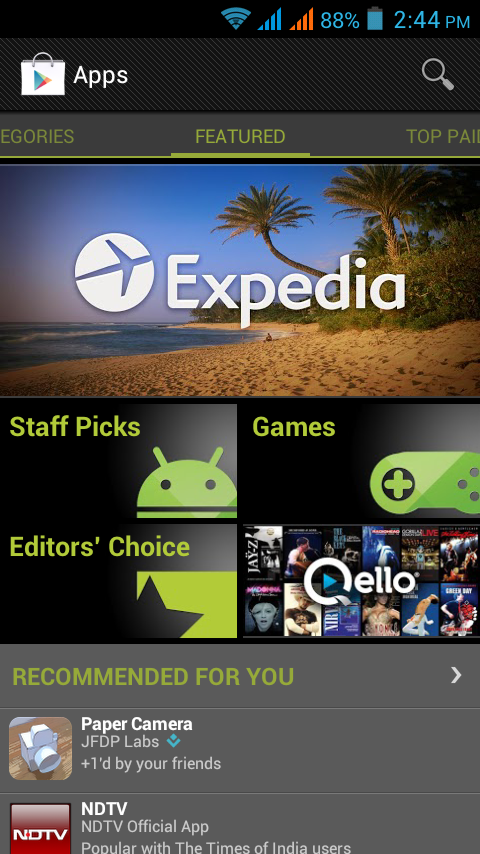
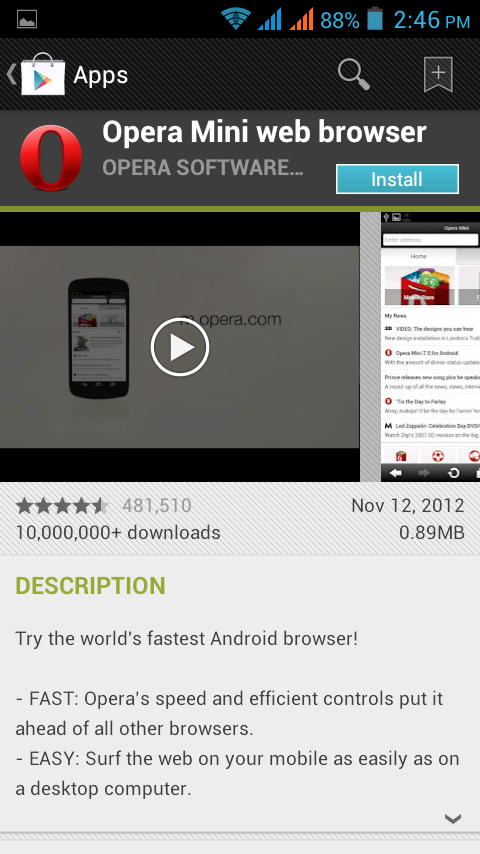
  2. You will see an interface similar to shown.
  3. You have options to Search apps and browse through various tabs which range from Featured to Top Paid to Top Free etc.
  4. Once you have made a choice, click on the Install button located on top left which will install that app. You can then locate the app from app menu similar to how you located Google Play store.

There is another option to install apps. If you can obtain the installable somehow you can directly run it by executing the appropriate file however to do so appropriately you may need to tweak your security settings.

You may need to allow non-market app installation by checking Systems Setting->Security->Unknown sources check box. However there is huge piece of advice here. Enabling this setting will open you to all kind of threats anyone can think off so please do it only if it’s absolutely necessary and disable as soon as possible.

Sunday, November 18, 2012

How to link your Google (Gmail) account with your Android phone?


The moment we start our new Android phone, it guides us through various steps to set-up itself. This also includes linking our Google account with our phone though we have an option to skip that and move on with it. However doing so we may be missing host of different services those operates on our Google account such as

  • Google Play (Your Android app store!)
  • Gmail (The Google mail client)
  • Gmail Contacts (Sync up of your phone contacts with Gmail contacts)
  • Youtube (You can still use YouTube without Google account however your preferences are fine-tuned and remembered having one.)
  • Blogger (The Google blog client)
  • Google+ (The Google social networking site)
  • Orkut (The Google social networking site)


and many others…

So if you have missed to set up Google account initially no worries. Follow below steps.

Android Ice Cream Sandwich

  1. Activate System Settings by long pressing on Home Screen or using appropriate button on your phone (generally located on lower left hand side)
  2. Select Accounts & Sync in the Personal section.
  3. Select Add Account and then select Google.
  4. Follow on screen instructions to complete the configuration.


Android Gingerbread

  1. Activate System Settings by long pressing on Home Screen or using appropriate button on your phone (generally located on lower left hand side)
  2. Scroll down and select Accounts & Sync.
  3. Select Add Account and then select Google.
  4. Follow on screen instructions to complete the configuration.

How to install SIM cards on Micromax Ninja 3 A57?

Here is a video demonstrating how to install SIM on Micromax Ninja 3 A57. Basically, its a dual SIM phone and the SIM casing is stacked one over another. This video will brief that.


How to transfer phonebook contacts from old phone to Android?

There is a time when we buy an Android phone and suddenly find ourselves searching ways to copy old phonebook contacts to new phone. Some manufacturers provide with PC suits which can assist in doing it however several others don’t. So for all those who don’t have PC suits and are using Android in its original form here are some ways to transfer contacts.

I am illustrating with example of Nokia to Android. These procedures may also work in similar way for other platforms as well.

Additionally, if you are opting to Sync using CSV/Outlook, you need to have your phone connected to Internet using either Wifi or 3G or EDGE. It will be needed on the last step of syncing contacts from Gmail to Phone. I would advise you to use WiFi for it. Other options like 3G/EDGE will involve operator costs that will be charged to your SIM based on your plan.


Android Ice Cream Sandwich (ICS) & Gingerbread

Copy old contacts on SIM card and transfer on new Android.

Copy contacts on sim card from old phone by using appropriate options mentioned in its manual. For example, on Nokia Symbian v5.0 (Nokia 5800) it can be done as show below.

1)     Goto Contacts and select Options.
2)     Select Mark/Unmark option and then select Mark All.
3)     Again select Options and then select Copy.
4)     A dialog will appear asking if you want to copy the contacts to SIM, Select OK and wait for them to be copied over to SIM.

Nokia 5800 contacts screen

After successful copy, switch off the old phone and take out the SIM from old phone and insert it in new Android.

Switch on the Android phone and:

On ICS
  1. Open contacts from home page.
  2. Goto Settings by pressing settings button on bottom left corner either on device or on screen as shown.
  3. Goto Import/Export->Scroll down and select appropriate SIM.
  4. Follow on-screen instructions to complete the process
  5. See below images for visual hints.

On GingerBread
  1. Open contacts from home page.
  2. Goto Settings by pressing settings button on bottom left corner either on device or on screen as shown.
  3. Goto Import/Export->Import from SIM card to Phone.
  4. Follow on screen instructions.
  5. See below images for hints.


Sync contacts with Outlook and upload to Gmail account.

By reading the title it’s obvious that you would need Outlook/Windows Contacts, Gmail accounts and old phone PC suite set up.

If you haven't yet linked your Google (Gmail) account with your Android phone click here to do so.

I will be illustrating it using Nokia PC suite (v3.2.100) and Outlook 2010 but it will hold true for other platforms as well.

The process involves three steps.

  • Using PC suite to transfer contacts to Outlook/Windows 
  • Using Outlook/Windows Contacts to export to .CSV
  •  Exporting .CSV to your Gmail contacts.

Using PC suite to transfer contacts to Outlook/Windows Contacts
1)     Connect the old phone to PC using USB/Bluetooth.
2)     Find the option to sync the phone contacts to PC. Nokia PC suit automatically does that.
3)     Find the option to export the contacts to .CSV. If that is supported out of box you won’t need Outlook and directly skip to Exporting CSV to Gmail. Nokia PC suit doesn’t allow exporting contacts to .CSV.
4)     Find an option to sync your contacts from PC suit to Outlook/Windows contact. Nokia PC Suit helps doing it using Sync->Sync Option and then Sync Now options. See screen shots below.


Using Outlook/Windows Contacts to export to .CSV
1)     After above steps the contacts will automatically appear in Outlook. See Contacts tab of Outlook.
2)     Export the contacts from Outlook to CSV format. Outlook 2010 allows doing that as follows.
·        Goto File->Options to bring up options screen.
·        Click on Advanced tabs on left hand side tab strip.
·        Click on Export button to bring up the Export dialog box.
·        Click on Export to File option.
·        Select Comma Separated Values (CSV)
·        Follow on screen instructions to save the file which will later be uploaded to Gmail contacts.

Exporting .CSV to your Gmail contacts
1.      Sign in to Gmail.
2.      Click Gmail at the top-left corner of your Gmail page, then choose Contacts.
3.      From the More actions dropdown menu, select Import....
4.      Click the Choose File button.
5.      Select the file you'd like to upload and click the Import button.

Click here to see the Google support page for more information 

After this wait for Gmail to sync your contacts to your phone. It may be faster on WiFi and 3G networks and slowest on EDGE.

Saturday, November 17, 2012

How to take Screenshot on Android phone?

A screen shot or screen capture is a way to capture and store the current display of screen in form of image on your device memory storage. Such images can then be shared with friends or set as wallpapers etc.


Taking screenshot on Android phoneAndroid Ice Cream Sandwich (ICS)

Beginning from ICS, Android has a built-in feature to take snaps of the on-going activity on the screen. This is how it can be done.

  1. Press and hold the volume low (-) and power button at the same time on your device.
  2. See the screen shot below for illustration, it may vary for your device.


Power button of Android phone
Volume down button of Android phone 


Android Gingerbread

Gingerbread has no inbuilt feature for taking screen snap shots however there are free third party applications available which can help. These applications require Root Access to your Android ICS (what is Root Access?). You can download those from Google Play.

Presently I couldn’t find any reliable Screen Capture applications for plain GingerBread. However I have several which you can try off the shelf.

  • Dolphin Screen Cut
    It’s basically an Add-on to Dolphin web browser. So you need to also install Dolphin web browser. Once this add-in and browser are gelled you can have screen capture functionality up.

Friday, November 16, 2012

What is Rooted phone or Root access?

Rooting is process that gives you full access (administrative access) on the phone which otherwise runs in limited access mode. Rooting lets you change some very fundamental settings of the phone including overclocking the processor etc. But there is piece of advice here. Many manufacturers voids warranty if the phone is rooted hence please do it with extreme care.